Thursday, January 22, 2015

Carnival Marquee Letters

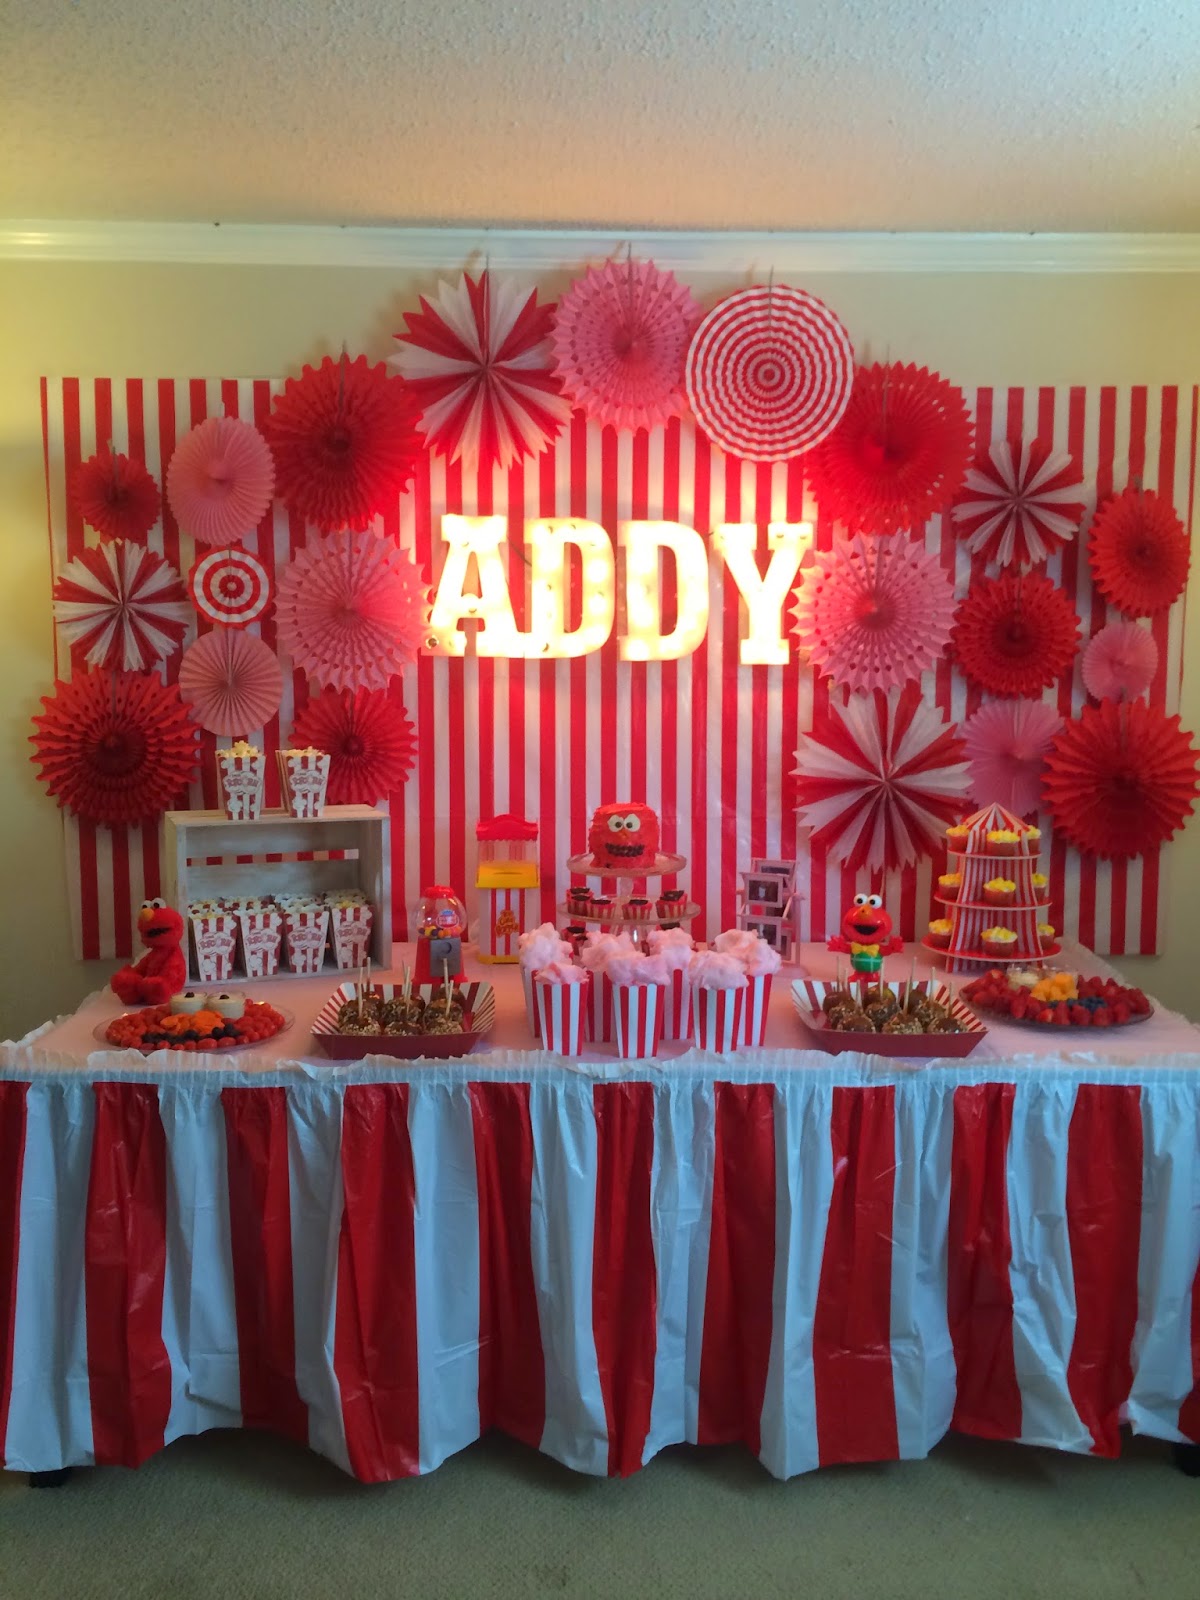
For Addy's Elmo Carnival, I really wanted to have marquee lights.  I decided to try my hand at making these myself.  Well, it eventually worked out, but I learned a lot along the way.  The "learning"...yeah, well, some of it should have been common sense.  I blame baby brain.  You can still get away with that 2 months post baby, right?  How about 6 months?  Or like forever? ; )  

Anyway, I started with these globe lights that I bought on clearance at Target after last Christmas.  I had bought them initially to string up outside for an outside party, but never had an outside party so much to my husband's delight...these were sitting in his man garage still in the box.  : )  


Hobby Lobby has unfinished letters for a little over $2 a piece.  Quite the steal.  I took these plain unfinished letters & painted them pink to go along with the party & because as most 3 year old girls...Addy loves pink.  So first step & this was key, I made sure that I knew the total number of lights I had.  The last thing I wanted to do was get a bunch of holes drilled & then not have enough lights or vice versa.  Then I played around a bit with how many lights I wanted on each letter.  I had 50 lights total, so I just divided those up around 12 or 13ish a letter.  Some letters seemed like they needed more, some less.  I was only spelling out Addy thank goodness since we all know my skills are a little lacking in the math department.  
I first made tiny drill holes with a smaller drill bit to make sure I had everything planned out.  This is what the tiny holes looked like.  Then, I used the biggest drill bit that my husband had & still had to alter that later (spoiler alert...I had to redrill, more on that in a minute).  Then I started attaching the bulbs.
I just took the bulbs apart & attached them through the hole in the wood.  (You can see the bigger drilled holes here).
Luckily these lights came with clips attached to them, so I could tuck the cords into the clips so they wouldn't show through the letters.
Here is what they looked like when all the bulbs were attached.  I was going to run the cord back behind the paper fan decorations so I made sure to have the lowest corner of the "Y" in "ADDY" be where I ended with the lights.
Now after you have all of your lights attached to your letters, the reasonable thing to do would be to plug in your lights & make sure they all work before hanging.  Not to go ahead & hang them.  Do you think that is what I did?  Of course not, that would be too easy.
Here is when I spent like 20 minutes hanging up these suckers & making sure they were even...only to plug them in & they wouldn't work.  What is not pictured here is the sheer rage I felt in that moment when the lights didn't work.  What was the problem?  Oh, the lights weren't touching enough of the green plastic things that hold the lights (surely there is a word for that, but I don't know it).  So what did I do?  Take it all down & take it all apart.  Then I drilled every hole bigger (I had to use the biggest drill bit & sort of move it around in a circle to carve out a big enough hole), restrung every light, retucked every cord & then rehung every letter.  AHHHHHH.  Yeah, I was about to lose my mind, but in the end it worked out & looked cute.  Here is the for-real finished project.
And here are the lights when they actually worked!  Yay!!!
My biggest advice, when you drill that very first hole, stick a light in there & cut the lights on to make sure that they have enough "connection" so you don't find yourself in a rage.  If you take out that blunder on my part, this project really wasn't that difficult or time consuming.  And they really did turn out cute.  Ok people, learn from my ridiculous mistakes & go make some letters. : )

See Other Posts About This Party


Wednesday, January 21, 2015

Elmo Carnival Decorations

I can say that decorating for Addy's Elmo Carnival Party was one of the most fun parties to decorate for...and also one of the most frustrating parties to decorate for.  I decided to try my hand at making carnival style marquee letters.  That frustration will be detailed in another post, but this post is reserved for all the other decorations from the party.  

I had seen a lot on Pinterest for carnival parties & initially I thought I might want to do red & turquoise as my colors.  However, I found a super cute Elmo dress for Addy that was pink & I decided to go with pink & red instead.  I wasn't really sure how it would turn out, but I had a LOT of pink decorations from Addy's Look Whoo is 1 birthday party & the Pink Diamond Damask baby shower, so that was incentive enough.  I had some basic red decorations from Addy's Hungry Caterpillar party.  I also had some red & white decorations that I used at the Ahoy! It's a Boy! nautical shower & again for our Memorial Day party.  I like to reuse if possible.  Here is the group of paper fans that I started with.  I have gotten a lot of these paper fans from Party City & Oriental Trading.  I found the red & white striped ones that look more carnival-like from Hobby Lobby.
I started by taping up a red & white striped tablecloth up on the wall as my backdrop.  This was just a simple plastic tablecloth that I found cheap at Hobby Lobby.  Then I hung a pink paper fan in the center to be my starting point. I use clear line & thumb tacks to attach the paper fans to the ceiling.
Then I just started adding more paper fans.
Here is the work in progress.  Can you tell I am a total mess when it comes to decorating for parties?
Once I had all the fans up, I added in the lights (read more about that here).


Then I got to work decorating the table.  I LOVE to implement a crate on my table somehow.  I am not sure my obsession with them.  I used a crate for this party for the boxes of popcorn.  I balanced the height of the crate with a carnival cupcake holder that I got online at Oriental Trading.  It held the Carnival Popcorn Cupcakes.
Next to the cupcake holder, I put one of Addy's Elmos.  This Elmo is like a Mr. Potato Head & can be dressed up in different outfits. He wore his circus bowtie for this event.  Beside Elmo is a Ferris Wheel picture frame.  It was silver, but I wanted it pink for the party & to put in Addy's room.  As my husband will tell you, I will pretty much paint anything.  : )  I filled the frame with pictures of Addy from the past year.
One the crate side of the table is the popcorn maker that sparked my whole idea for the Elmo carnival.  I also had a bubble gum machine that I ordered off of Amazon. The bubblegum got gone crazy quick.  Maybe I should have gotten one that actually required money?  ; )  Haha.  I set up a stuffed Elmo by the crate.  He sat there most of the party, except for every now & again Addy's friend Gabriela would come by & snatch him up.  She is also obsessed with Elmo.  Too cute.
Most of the serving trays were things that I already had, except for the carnival cupcake holder I mentioned earlier & the trays that the caramel apples were in.  They came from Hobby Lobby.  The popcorn boxes with the actual popcorn came from Hobby Lobby as well & the ones with cotton candy came from Oriental Trading.  The table skirt also came from OT.  We used an Elmo bucket that Addy used for trick or treating last year to put the silverware in.  
Addy had a great time at her Elmo carnival & hopefully everyone else did too...even after they came down from their sugar high. : )

See Other Posts About This Party

See this party pinned here on a Catch My Party's Pinterest board.

Elmo Carnival Snacks

 For Addy's Elmo Carnival, I kept it to the standard party food.  Cupcakes are my favorite of course, so we had Elmo Cupcakes (click here for that post) & Carnival Popcorn Cupcakes (click here for that post).  

 I got some pink cotton candy to put in popcorn containers.  How had I forgotten how good pink cotton candy was?  I am sure all the parents LOVED the fact that I was providing the kids with straight sugar...but hey, what's a 3 year old birthday party without lots of sugar? ; ) 
 To make parents feel better about all the sugar...I also had an Elmo vegetable tray with cherry tomatoes, carrot slices & olives. I had small bowls with Ranch dressing for the eyes.
 I also had an Elmo fruit tray with strawberries, cantaloupe & blueberries.  I used cream cheese fruit dip for the eyes. 
 Confession of a non-baker...This is my sad, sad Elmo cake below.  I tried to make a circus cake for the Elmo head to sit on.  It was pink & I was going to put red stripes on it.  In my head, it was going to be so cute.  I made two round cakes with my boxed cake mix, evened them out & stacked them on top of each other with icing in between the two layers.  Then I iced the cake with pink cream cheese frosting.  It looked great.  Then I started on the Elmo head.  I used the same clear Pyrex small bowl that I used to make Addy's owl smash cake & Addy's apple cake .  I used chocolate cake mix & baked half in the bowl & then baked the other half in the bowl after I cooled the first half.  I know, I know.  One day I will invest in just another bowl to bake them at the same time. ; )  Then I took cream cheese icing & tinted it red with food coloring.  I couldn't find big sugared eyes like the small ones I used for the Elmo cupcakes so I used the icing from the inside of an Oreo.  I could have just used regular vanilla icing & put it in the freezer for a while to harden, but this was straight impulse & I just stuck the Oreo icing on the face & went with it.  I used Reese's pieces for the nose & the mouth.  I will be the first to admit that Elmo looks a little creepy.  Sort of Lego head meets an Alien, but whatever.  I stuck him under the big marquee lights & hoped that nobody noticed in the lighting. ; ) 

Well if you look at the picture below, you will notice that the bottom of Elmo looks a little weird & that he is not sitting on this circus cake that I mentioned.  Yeah...about that.  So I put Elmo's head on top of my circus cake...and he smushed my cake.  Like I mean the sides of the cake gave out & everything.  I guess the center wasn't as strong as it should have been.  I don't for-real bake (Captain Obvious, I know), just boxed stuff for the most part so maybe you bakers know some tricks like letting it set in the freezer or something before stacking...yeah, I don't know.  I just know that Elmo's big, weird, Lego-Alien head crushed the other cake so he had to sit all by his lonesome on the cake tray.  So there ya go.  My creepy, lonely Elmo head.  : ) 
 I also served popcorn in little popcorn boxes & caramel apples.  I have no idea why I don't have a picture of the caramel apples, but I bought them at Walmart in a 3 pack.  I like to try & DIY as much as possible, but making caramel apples when you are short on time was not something I felt like trying my hand at.
 This was the spread.  You can see the two little trays on each side of the cotton candy, yeah, that's the poor caramel apples that didn't make it into a picture.  : )  Well, now I'm hungry & want a cupcake...Happy Wednesday everyone!
See Other Posts About This Party

See this party pinned here and here on a Catch My Party Pinterest board.

Saturday, January 10, 2015

Carnival Popcorn Cupcakes


For Addy's Elmo Carnival, one of the sweets was popcorn cupcakes.  These were fun to make & turned out pretty cute.  I went to Pinterest to look for some ideas & found my inspiration at Mess for Less & Slate & Stylish.  I didn't make have the cute popcorn cupcake labels, so I just used some regular red & white striped ones.  Here are the finished cupcakes...
 And now for how you make them...
Here is where I would love to tell you that I made some delicious gourmet cupcakes & then provide you with a recipe.  I didn't.  There are some details that I love to spend time on for my parties, baking homemade cupcakes is typically not one of them.  Don't hate me. ; )  I used a boxed vanilla mix.  I piled on the cream cheese icing, 1) because the more icing you have, the more marshmallows the cupcake will hold & 2) I really love cream cheese icing.  
After you have the icing slathered on, just take mini-marshmallows & put them all over the cupcake.  The more, the better.  
 After all of your marshmallows are on, take some yellow food coloring & a tiny paintbrush (I bought a bag of random craft paintbrushes at Walmart once upon a time & I just used the tiniest of those, it worked great). When painting on, just use as much yellow food coloring as you would butter on popcorn...so if you notice, my popcorn is quite buttery. ; ) Delicious.
So there you go, delicious "popcorn" cupcakes that are super cute & super easy to make.  Happy weekend everyone!

See Other Posts About This Party

See this pin here on Catch My Party's Pinterest board.

Tuesday, January 6, 2015

Elmo Cupcakes


Well you can't have an Elmo Carnival without Elmo cupcakes.  These were super easy to make & pretty delicious. 
The cupcakes are cream cheese icing with red food coloring.  I found the great red & white striped cupcake holders at Michaels. 
 I saw some cute ideas on Pinterest for how to do Elmo eyes, but easy won this battle when I saw these Wilton candy eyeballs at Walmart.  Uh, yes please.

 After adding in the candy eyes, I needed something orange for the nose.  How can you always make cupcakes even more delicious?  Add candy of course.  As you can see on my cupcake page, I love adding mini M&Ms, tootsie rolls, airheads, etc. to cupcakes.  And what candy is delicious & orange?  Hello Reese's pieces.

 As you can see with my owl cupcakes from Addy's "Look Whoo is 1" birthday party, I also have a tendency of adding oreos to cupcakes. : )   An oreo cookie broken in half was the perfect Elmo smile.
 The mouths weren't perfectly straight, but even with my OCD, I didn't mind because these cupcakes were delicious.  Happy Tuesday everyone!
See Other Posts About This Party

See this party pinned here on a Catch My Party Pinterest board.